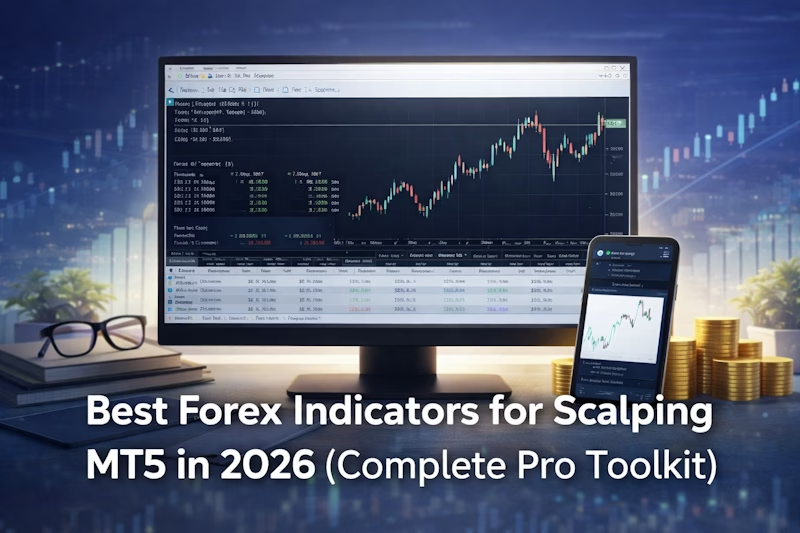
Scalping demands fast signals, low noise, and indicators that do not repaint. Miss any one of those three requirements and you are handing money to the market. This guide covers the best forex indicators for scalping MT5 in 2026 — what each one does, exactly how to use it, the settings that work on low timeframes, and which free tools from MQL5.com are worth adding to your chart right now.
What scalping indicators actually need to do
Scalpers need three things from an indicator: speed, clarity, and reliability on low timeframes. Lagging tools like slow simple moving averages are nearly useless when you are working on a 1-minute or 5-minute chart — by the time they confirm a move, the opportunity is already behind you.
The best scalping indicators do one of three jobs: they show momentum in real time, they identify key price levels before price arrives, or they filter out noise so you can read structure cleanly. The ten indicators below cover all three functions and together form a complete, disciplined toolkit for fast-execution trading on MT5.
One more thing that is non-negotiable: no repainting. An indicator that changes its historical signals is worse than having no indicator at all. Every tool in this list produces confirmed, non-repainting output.
The best forex indicators for scalping MT5 in 2026
-
Multi-Timeframe Bollinger Bands
 1")
MTF Bollinger Bands – multi-timeframe view on a single chart
Standard Bollinger Bands on a single timeframe tell you where price is relative to its recent volatility. That is useful, but incomplete. The real edge comes from using a multi-timeframe Bollinger Bands indicator that overlays higher timeframe bands directly on your execution chart — no tab-switching, no guesswork.
When the 15-minute bands are in a tight squeeze and price simultaneously hits the 1-minute lower band, you have two-layer confluence. That combination produces far higher-probability entries than either signal alone. A Bollinger Band squeeze (when the bands contract to a narrow range) is one of the most reliable precursors to a high-velocity breakout — the kind of move scalpers live for.
Recommended settings for scalping: Period 20, deviation 2.0 (standard) on your execution timeframe. Display the 15-minute and 1-hour bands as overlay panels. Use deviation 2.5 on the higher timeframe panels to account for expanded range.
When to use it: Scalp band bounces during range sessions such as early Asian or late New York overlap. In trending conditions, use the upper band as a dynamic resistance to short into and the lower band as a dynamic support to buy from — but only in the direction of the higher timeframe trend. If the 15-minute band is expanding outward while price breaks the 1-minute upper band on volume, that is a breakout entry, not a mean-reversion fade.
What to avoid: Do not fade the band on a 1-minute chart during a news-driven trend. In strong directional moves, price can walk the band for dozens of candles. Always check higher timeframe band direction before counter-trend entries.
-
Multi-Timeframe Moving Averages (EMA Stack)
 2")
Indicator example on a daily chart
Scalping counter-trend is the single most common mistake new scalpers make. It feels right in the moment — price looks extended, “surely it will pull back” — but fading a strong intraday trend without multi-timeframe confirmation is gambling, not trading.
The MTF Triple Moving Averages indicator displays EMA values from the 1-minute, 5-minute, and 15-minute charts simultaneously in one panel. When all three align — all pointing up, or all pointing down — you have clean trend alignment and the green light to scalp in that direction exclusively. This is the EMA stack concept used by professional intraday traders: the faster EMA leads, the medium EMA confirms, and the slow EMA provides the structural bias.
Recommended settings for scalping: Use EMA 9 and EMA 21 as your primary fast signals, with EMA 50 as your structural bias filter. On the 5-minute and 15-minute overlays, the 50 EMA acts as your “no-trade zone” boundary — if price is fighting the 50 EMA on the 5-minute, step aside and wait for a clean resolution.
When to use it: Apply this as a mandatory trend filter before every entry. Mixed alignment means no trade, no exception. This discipline alone eliminates a large percentage of losing scalps. Particularly valuable during the fast-moving London open and the New York 8:30 AM EST window when intraday trends establish within minutes.
What to avoid: Do not use SMA here. Simple moving averages are too slow for scalping timeframes. EMA reacts faster to recent price action and is the correct choice for M1–M15 work.
-
VWAP (Volume Weighted Average Price)
VWAP is the single most important intraday reference level that most retail scalpers ignore — yet every institutional desk, algorithmic system, and prop firm trader watches it constantly. VWAP calculates the average price weighted by volume traded throughout the day, resetting at the start of each session. It represents the true average transaction price of the day and acts as a magnet that price consistently gravitates toward and reacts off.
For scalpers, VWAP serves three critical functions. First, it defines intraday bias: price above VWAP favors longs, price below VWAP favors shorts. Second, it acts as a dynamic support and resistance level that refreshes in real time — far more responsive than static daily pivots. Third, VWAP deviations (standard deviation bands plotted around VWAP, often called VWAP bands or anchored VWAP envelopes) define overextension zones where mean-reversion scalps have statistically strong setups.
Recommended settings for scalping: Use the standard session VWAP with 1 and 2 standard deviation bands plotted above and below. On M5–M15, entries near the 1st deviation band with a confirming Stochastic cross are high-probability mean-reversion setups. When price is at the 2nd deviation band and momentum is exhausted (Stochastic divergence, waning volume), that is a premium fade entry.
When to use it: VWAP is most effective during liquid sessions — London and New York. During the Asian session, volume is lower and VWAP bands are tighter, so deviations are less meaningful. The most reliable VWAP scalp setup is the VWAP reclaim: price dips below VWAP, stalls, and then closes back above it on a 5-minute candle — enter long with a stop below the low of the reclaim candle.
 3")
Free MQL5 resource: The Adaptive VWAP Institutional on the MQL5 Code Base includes session-accurate VWAP resets for forex (5 PM New York standard) and optional deviation bands. It is free, non-repainting, and actively maintained.
What to avoid: Do not treat VWAP as a guaranteed support or resistance. In strong trending sessions, price can trade far from VWAP for extended periods. Always confirm VWAP reactions with momentum context — a stochastic extreme, a candlestick rejection, or an EMA alignment in your favor.
-
Forex Scanner for Pre-Filtering Pairs
 4")
MT5 Forex Scanner – live RSI, spread, ADX and MA data across all pairs
Time is a scalper’s most limited resource. Manually cycling through 20 pairs on a 1-minute chart during the London-New York overlap is impossible — by the time you finish, the setups you spotted at the start have come and gone. A multi-purpose forex scanner solves this by monitoring all pairs simultaneously and surfacing only those that meet your pre-defined conditions.
The scanner displays live RSI, spread, ADX trend strength, and MA direction across every pair in a single dashboard. You see everything at once. Your job becomes responding to alerts, not hunting for them.
What to look for on the scanner: Low spread (within your risk tolerance for that session), RSI approaching an extreme (below 30 or above 70 for reversal setups, or breaking 50 for trend-follow entries), ADX above 25 confirming trend strength, and MA direction matching your intended trade. When all four line up on the same pair, open that chart immediately.
When to use it: Launch the scanner at session open and let it pre-filter. During London-New York overlap, multiple pairs move simultaneously and the scanner is the only practical way to catch every qualifying setup without missing opportunities or overtrading low-quality ones.
What to avoid: Do not trade a pair just because the scanner flags it. The scanner shortlists — it does not confirm entries. You still need price action context and a tight stop before pulling the trigger.
-
Pivot Points for Intraday Levels
 5")
Fxtt Pivot Points Indicator for MT5
Price does not move randomly. Institutional desks, algorithms, and market makers all watch pivot levels — which is exactly why these levels continue to produce reactions decades after they were first published. The FXTT Pivot Points MT5 indicator plots daily, weekly, and monthly pivots on your chart without manual calculation.
For scalpers, pivots serve three purposes: they define natural entry targets where price is likely to react, they provide clean stop placement anchors just beyond a level, and they set realistic profit targets for 5–20 pip scalps without arbitrary guessing. Combining pivots with VWAP creates an extremely powerful confluence framework — when a pivot level and VWAP coincide or are within 3–5 pips of each other, that zone has double institutional significance.
How to use the levels: Load the daily pivots before each session. Mark PP (central pivot), R1, R2, S1, and S2. Enter scalps when price approaches a pivot and produces a rejection signal — a pin bar, a Stochastic crossing from an extreme, a ZigZag zone reaction, or a failed breakout candle. Do not chase entries mid-range between pivots where there is no natural reaction point and risk-reward collapses.
Weekly and monthly pivots: Weekly pivots are most useful on Mondays and Fridays to gauge the broader session bias. Monthly pivots act as major support and resistance — price approaching a monthly R1 during a 1-minute scalp session is a warning to reduce position size or skip the trade entirely.
What to avoid: Avoid entering scalps right at PP mid-range during a slow Thursday afternoon with no momentum. The best pivot trades happen at the extremes (R2, S2) early in the session when institutional flow is still present.
-
ATR (Average True Range) for Dynamic Stop Placement
The Average True Range is the most underrated tool in a scalper’s kit. It does not generate buy or sell signals — it tells you how much a pair is actually moving per candle right now, which determines whether your stop size makes sense and whether the reward you are targeting is realistic given current volatility.
The built-in MT5 ATR is fully sufficient. Set it to period 14 on your execution timeframe. Read the current ATR value before entering any trade and use it to size both your stop and your target dynamically. A fixed 10-pip stop during a high-volatility London open is far too tight; that same 10-pip stop during a dead Asian session may be too wide. ATR makes your risk sizing adaptive to actual market conditions.
How to use it for scalping: Place your stop at 1× to 1.5× ATR below (for longs) or above (for shorts) your entry candle. Target a minimum of 1.5× to 2× ATR for your take profit. If the spread alone exceeds 20% of the current ATR value, skip the trade — you are surrendering too large a percentage of the expected move before the trade even starts.
ATR as a session filter: Low ATR on a 1-minute chart (below 3–4 pips on major pairs) means the market is dead. Scalping dead markets generates commission and spread costs with no movement to capture. When ATR expands sharply, that is when scalping opportunities become viable. Monitor ATR at the London open and 8:30 AM New York — ATR typically spikes at these moments and the best setups follow.
 6")
Free MQL5 resource: The ATR indicator included in Metatrader 5 shows the volatility of the market.
-
ZigZag Zones MT5 for Structure-Based Entry Filtering
Most scalpers redraw support and resistance manually every session — meaning levels shift based on discretion rather than a repeatable method. The FXTT ZigZag Zones MT5 indicator removes that inconsistency entirely. It plots two independent ZigZag lines (fast and slow) and automatically generates pivot-based support and resistance zones, sized dynamically using ATR so they adapt to current volatility rather than remaining static.
For scalpers, ZigZag Zones replaces the need to redraw levels before each session. You get an objective, repeatable structure map that updates with each confirmed swing. The slow ZigZag provides the higher-confidence support and resistance framework; the fast ZigZag tracks short-term momentum shifts as price approaches those areas. When the fast ZigZag turns at a slow-ZigZag zone, that is a high-probability entry setup with a clear and methodical invalidation point.
Recommended settings for scalping: Use the default ATR-based zone sizing on M5 and M15. Enable the fast-pivot inclusion toggle during fast-moving sessions such as the London open to generate more reactive zones. Keep broken-zone visibility enabled so you can track post-breakout retests objectively rather than guessing whether a breached level still matters.
When to use it: Deploy ZigZag Zones as your primary structure reference for entry identification and stop placement. When price approaches a slow-ZigZag zone during a London or New York session, wait for the fast ZigZag to confirm a directional turn before entering. This approach delivers level confluence plus momentum confirmation — the two most critical components of a scalp entry — from a single, non-repainting indicator.
 7")
Automatic support and resistance zones generated from repeated ZigZag pivot clusters
What to avoid: Do not enter a trade purely because price is inside a zone. A zone is a watch area, not a trigger. Require the fast ZigZag to confirm a structural shift — or combine with Stochastic timing — before executing. In low-ATR environments where zones compress, reduce position size or wait for volatility to expand before trusting zone reactions.
-
Stochastic Oscillator for Precise Entry Timing
The Stochastic Oscillator complements ZigZag Zones by providing dual-line crossover signals within overbought and oversold zones. While ZigZag Zones tell you where to trade, Stochastic tells you precisely when to pull the trigger. That distinction matters in scalping — you need to know not just that a reversal is likely at a level, but when momentum is confirming the turn.
The key advantage of the %K/%D crossover system: a %K line crossing above %D inside the oversold zone (below 20) is a timed buy trigger, not just a zone entry. This precision is valuable when price is approaching a ZigZag Zone or pivot level and you are waiting for confirmation rather than anticipating it.
Recommended settings for scalping: Use 5,3,3 (fast Stochastic) on M1–M5 for responsive scalping signals. On M15 as a filter, use 14,3,3 (standard). Trade the cross only when both lines are inside the overbought or oversold zone — mid-range crosses carry no statistical edge. The cross must occur at a meaningful price level (pivot, VWAP, Bollinger Band extreme, or ZigZag Zone) to be valid.
When to use it: Stochastic is most reliable in ranging markets. During a sideways Asian session, pivot + ZigZag Zone + Stochastic is an extremely clean combination for timing entry. During strong trending markets (London open breakout, for example), reduce reliance on Stochastic and focus on trend-following tools.
 8")
Free MQL5 resource: The SC MTF Stochastic RSI for MT5 on MQL5.com combines Stochastic and RSI into a single multi-timeframe oscillator with built-in alerts — one of the most practically useful free tools for scalpers who want timing and momentum confirmation in one window.
What to avoid: Never use Stochastic as your only entry trigger. It generates frequent signals in choppy markets, many of which are low-probability. Always require at least one additional confirmation — a ZigZag Zone reaction, a pivot level, a VWAP band — before acting on a Stochastic cross.
-
News Calendar MT5 for Macro Timing and Event Risk Avoidance
 9")
FXTT News Calendar MT5 – economic events displayed directly on your execution chart
The single most avoidable category of scalping losses is entering just before a high-impact news release. Price spikes, spreads widen, and stops fill at unexpected levels — not because the setup was wrong but because the timing was blind. The FXTT News Calendar MT5 indicator eliminates that problem by displaying upcoming economic events directly on your chart through a compact panel and color-coded vertical event lines — no browser-switching required.
For scalpers, macro timing matters in two directions. First, it defines when not to trade: enforce a hard no-trade window of 10 to 15 minutes before any high-impact release for your active currency pair. Second, it surfaces genuine opportunities: the post-event confirmation candle — the first candle after a release that shows directional commitment with normalized spread — is one of the most reliable scalp setups on the calendar. Without event timing visible on your chart, most traders miss this window or chase too late.
Recommended settings for scalping: Filter to high-impact events only for the currencies you actively trade. Set automatic refresh to every 15 to 30 minutes to keep the panel current without constant reloading. Combine the vertical event lines with your ZigZag Zones — when a high-impact event line falls at the same price area as a major structure zone, treat that zone with extra caution before the release and monitor it closely for a post-release retest setup.
 10")
News Calendar event lines aligned with ZigZag Zones structure areas
When to use it: Active throughout the entire session. On EURUSD and GBPUSD, filter to USD and EUR events. On XAUUSD, prioritize USD data releases — NFP, CPI, and FOMC. On indices, treat all high-impact USD events as relevant. The sharper the expected spread impact, the wider your pre-event exclusion window should be.
What to avoid: Do not trade into high-spread, high-impact releases unless you are specifically structured for news volatility with wider stops and reduced size. Treat the five minutes immediately before a red-folder event as a hard no-trade zone — spread expansion during that window typically makes risk-reward unworkable for standard scalping.
-
SuperTrend for Real-Time Trend Bias
The SuperTrend indicator is an ATR-based trend filter that plots a single colored line above or below price — green when the trend is up, red when it is down. When the line flips color, it signals a trend change. It is simple, visual, and fast-reacting in a way that moving average crossovers are not, because it incorporates volatility directly into its calculation through ATR.
For scalping, SuperTrend serves as a quick-read trend bias tool. If SuperTrend is red (price trading below the line), you only look for short entries. If it is green, longs only. This binary discipline eliminates counter-trend entries, which are the most common source of blown scalping accounts. Combined with VWAP bias (price above or below VWAP) and EMA stack direction, you now have three independent trend filters all confirming the same direction — that is an extremely high-confidence condition.
Recommended settings for scalping: ATR period 10, multiplier 2.0 on M5 charts. On M1 charts, reduce to ATR period 7, multiplier 1.5 for faster response. The wider the multiplier, the fewer but more reliable the signals — increase it during high-volatility sessions, decrease during quiet periods.
 11")
Free MQL5 resource: The SuperTrend Indicator on MQL5 Code Base is free, highly rated by the community, non-repainting, and used by thousands of traders globally. It can be installed in under a minute directly from the MT5 Code Base. Combine it with your EMA stack and ZigZag Zones: if SuperTrend is green, all three EMAs are stacked bullish, price is above VWAP, and price is reacting from a ZigZag Zone — that is your cleanest possible long entry condition.What to avoid: SuperTrend whipsaws in ranging markets. If ATR is low and price is consolidating, SuperTrend will flip back and forth generating false signals. Apply it only during sessions with measurable momentum — confirmed by an ADX reading above 20–25.
How to combine these indicators into a scalping system
Using ten indicators without a workflow produces chart clutter and decision paralysis. The correct approach is a layered system where each indicator plays a specific role and a signal only triggers when multiple layers confirm simultaneously. This is the framework professional scalpers use — not because they need every indicator on every trade, but because each layer eliminates a category of bad trade.
Layer 1 — Session and market context (before the session opens): Check the Daily Data indicator for spread baseline and daily range consumed. Check ATR on the 15-minute chart to confirm whether the market is moving or flat. Load weekly pivots for major levels in play today. Review the News Calendar for high-impact events scheduled during your session and mark your no-trade windows.
Layer 2 — Trend filter (updates every few minutes): Check the MTF Triple MAs, SuperTrend, and VWAP bias on the 5-minute and 15-minute charts. Determine the session bias — long only, short only, or no-trade range. Do not enter against this combined bias.
Layer 3 — Pair selection (ongoing during the session): Run the Forex Scanner in the background. When a pair meets your spread, ADX, and MA criteria simultaneously, bring that chart front and center. Cross-reference ZigZag Zones on that chart to confirm a meaningful structure level is within reach before committing to the trade.
Layer 4 — Entry timing (on the execution chart): Price must be approaching or at a meaningful level — a pivot, a Bollinger Band extreme, a VWAP deviation band, or a ZigZag Zone. Stochastic must be at an extreme with a fresh cross confirming the level reaction. Check the News Calendar panel to verify no high-impact release is within 15 minutes of your entry. ATR must be large enough to cover spread plus your target.
Layer 5 — Stop and target sizing: Set stop at 1× to 1.5× ATR. Set target at minimum 1.5× ATR. If the math does not work, skip the trade. No valid setup should ever require a wide stop to “make sense.”
When all five layers align, execute immediately and without hesitation. When they do not, wait. Most of scalping’s edge comes from patience and selectivity, not from trade frequency.
Key rules every MT5 scalper must follow
- Never trade against the higher timeframe trend, even on a 1-minute chart — use your EMA stack, SuperTrend, and VWAP to define that trend before the session
- Require at least two independent confirmations before every entry — a ZigZag Zone or pivot level plus a Stochastic cross is the minimum
- Check live spread before every trade — high-spread periods destroy your edge instantly, especially on pairs like GBPJPY or GBPUSD during illiquid hours
- Use ATR to size your stop and target dynamically — fixed pip stops are inappropriate for scalping because volatility changes continuously throughout the session
- Use the News Calendar MT5 indicator to track high-impact releases in real time — define a hard no-trade window of 10 to 15 minutes before red-folder events for your active currency pair and enforce it without exception. Post-event confirmation candles, once spread normalizes, are often cleaner entry opportunities than pre-event guesses
- Treat VWAP as the anchor for daily bias — if you cannot identify which side of VWAP you should be trading on, you should not be trading yet
- Keep a session log — if a setup type is consistently losing, identify it and remove it from your system rather than trading it with “more discipline”